Support Center

Find your answer in our knowledge base

Mobile Settings For A Chatbot

Step 1

For the mobile settings of the chatbot, go to “chatbot for website”

Step 2

Then next Click the “Mobile Settings” link.

Step 3

Hit the toggle on if you want to hide the chatbot on the mobile

Step 4

Hit the second toggle on if you want to hide the chatbot popup on website load for mobile

Step 5

Also, you can customize the size of the chatbot

Step 6

At last, Click the “Save” button to save the settings

How To Create A User Segment

Learn how to create a user segment in the simplest steps

Step 1

To create a user segment, you first need to create a “data store”. For that go to chatbot AI at the extreme left toolbar

Step 2

Once the chatbot AI has opened, the next is to hit “datastore”

Step 3

A window will open up showcasing a “create a Datastore” button. Hit that to start creating one.

Step 4

Name your “datastore” and add its values, as shown below

Step 5

Hit the toggle on to land the created “datastore” into the user segment


Step 6

Click the “Add Datastore” button to add it.

Step 7

The datastore has been created, therefore, the next is to create the user segment for that go to “users”

Step 8

Click the “User Segmentation” to continue creating the user segments.

Step 9

Enter the entities such as; name, attribute, operator, and value

Step 10

Click the “Create” button to create the user segment.

Creating An Image Media Block

This instructional guide will help you create the image media block for your story

Step 1

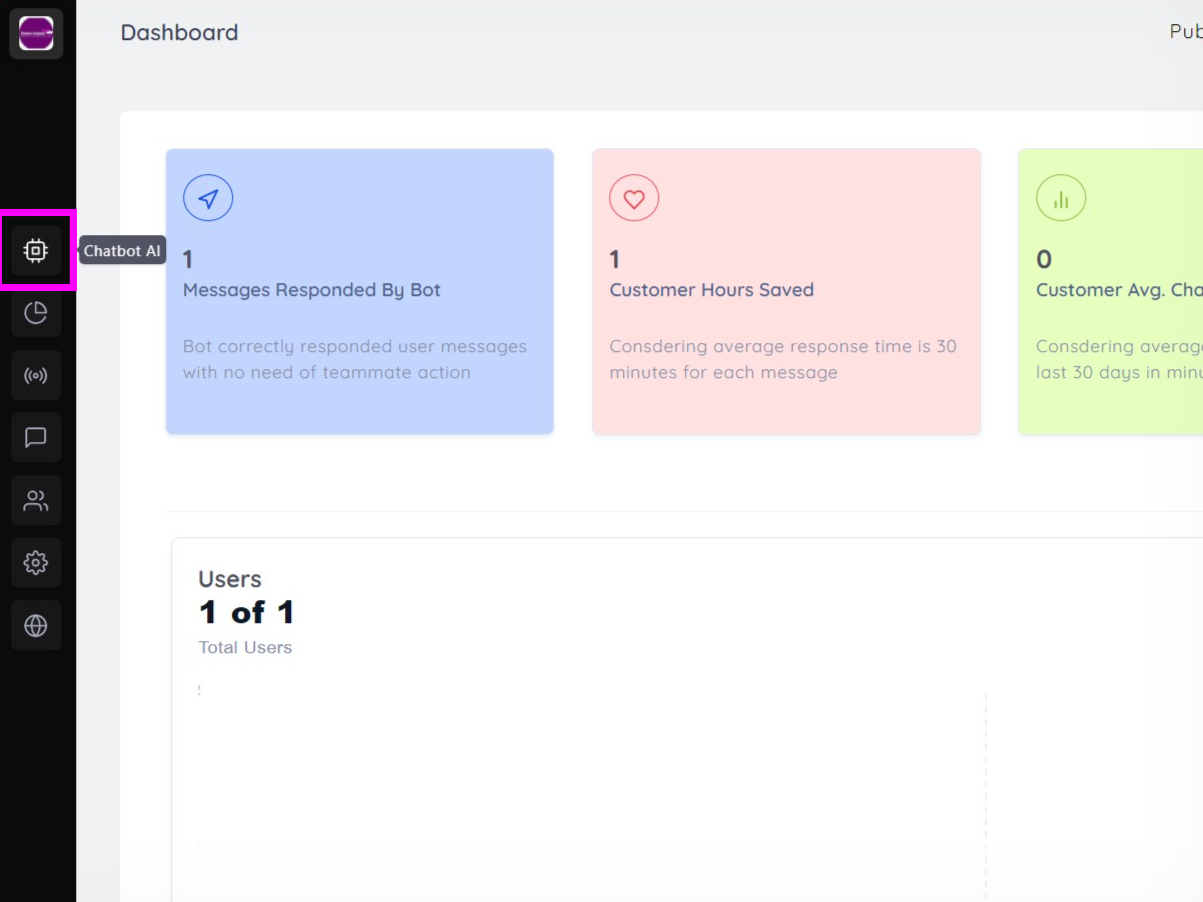
To start creating the media block go to “chatbot AI” from the extreme left toolbar

Step 2

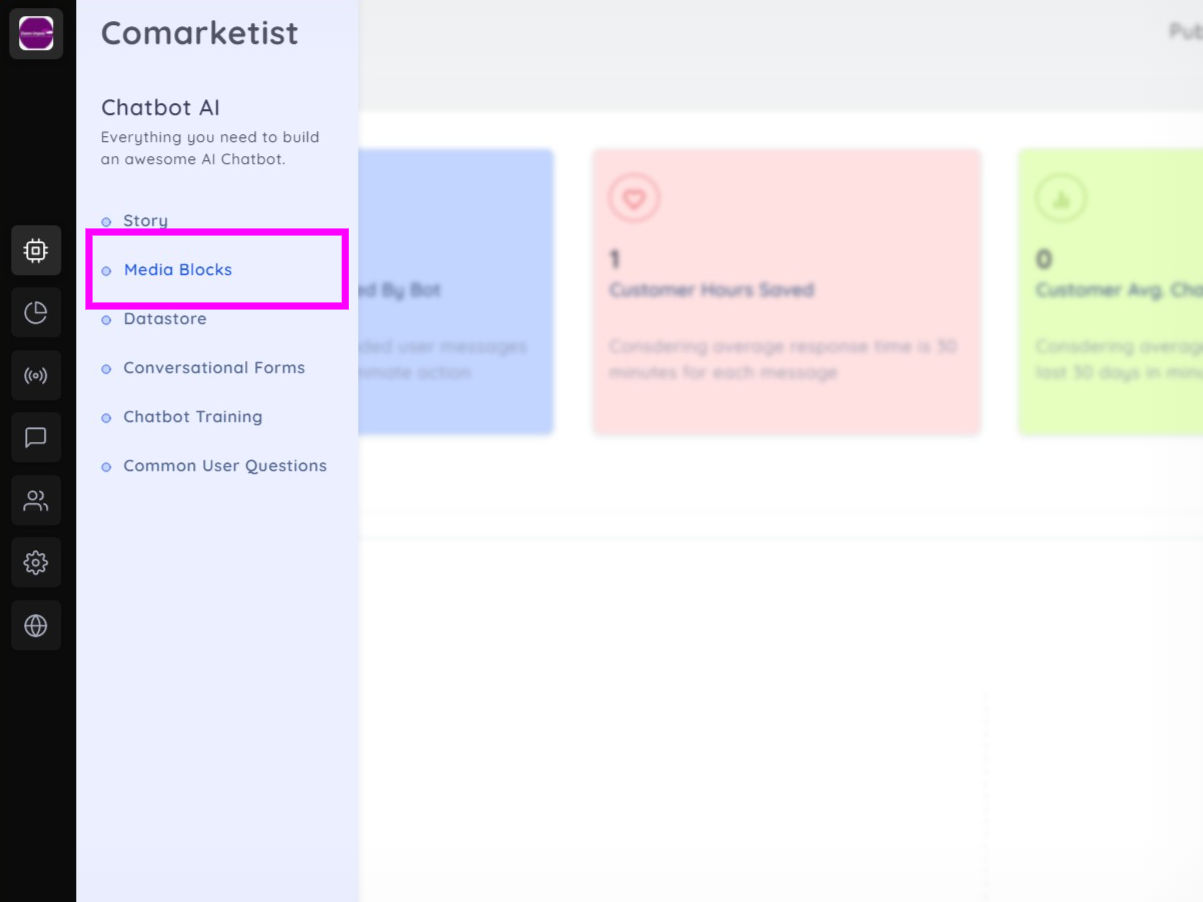
From the chatbot AI section click the “Media Blocks” to start with building the media blocks.

Step 3

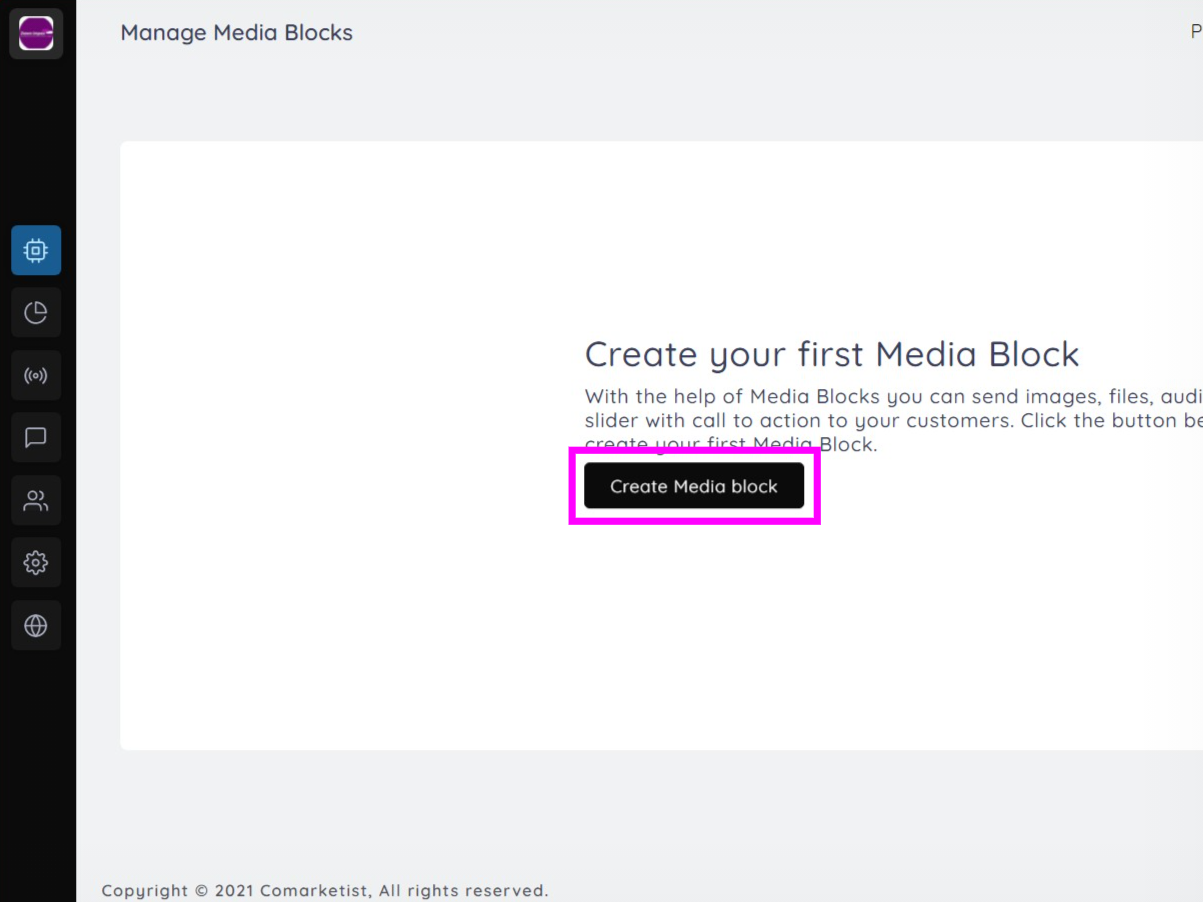
The window, as shown above, will appear then click the “Create Media block” link to continue creating the media block.

Step 4

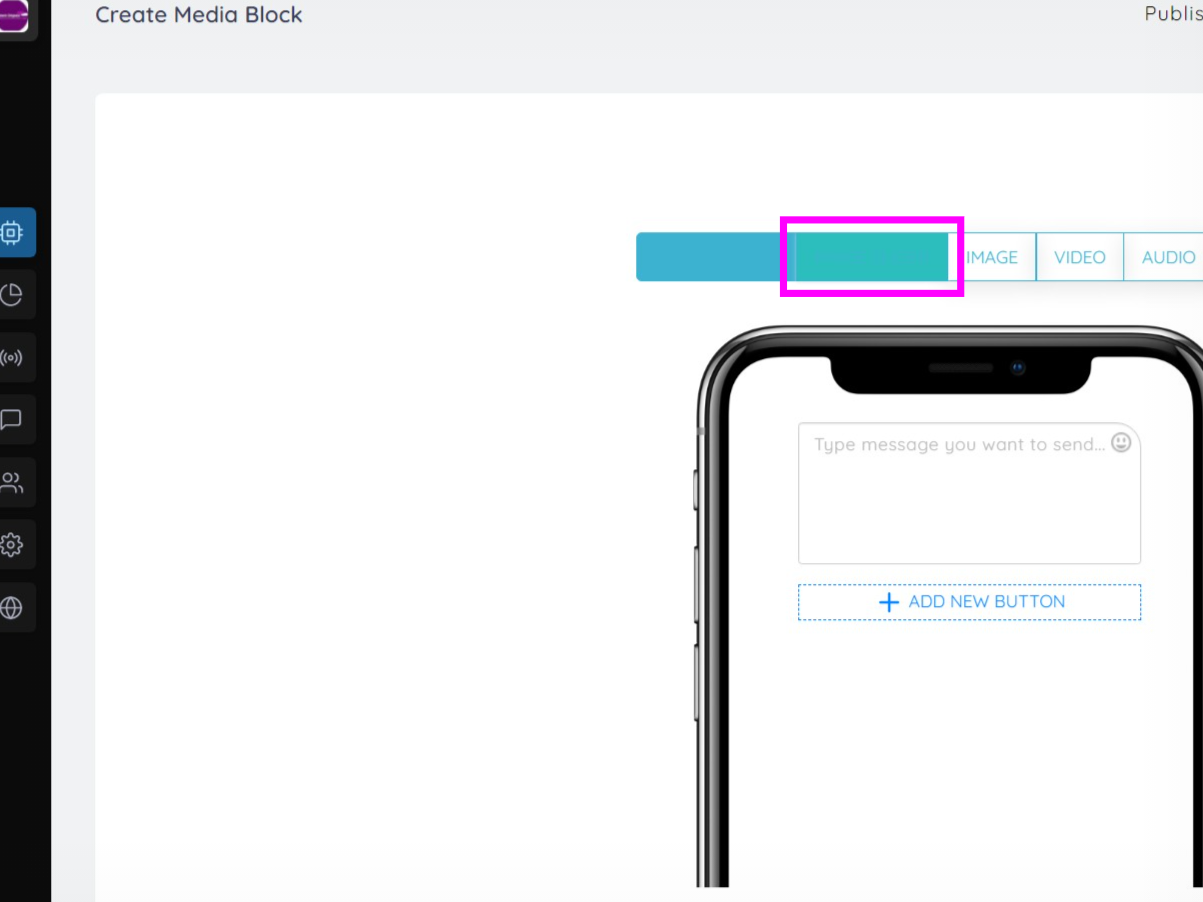
The page like above will appear, which has multiple options such as text message, image slider, image, video, and audio. Click the “IMAGE SLIDER” button as you are creating an image media block.

Step 5

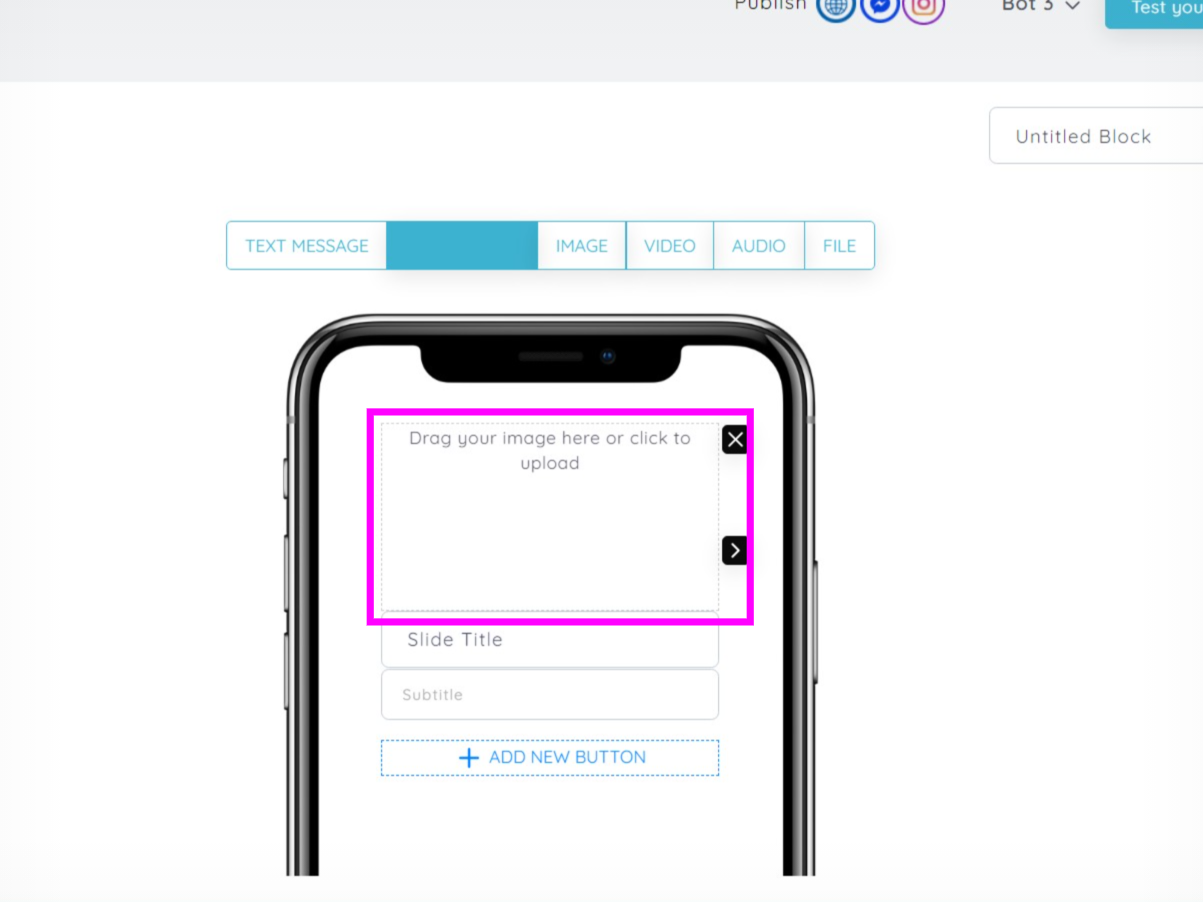
Drag your image or click to upload to the image for the media block.

Step 6

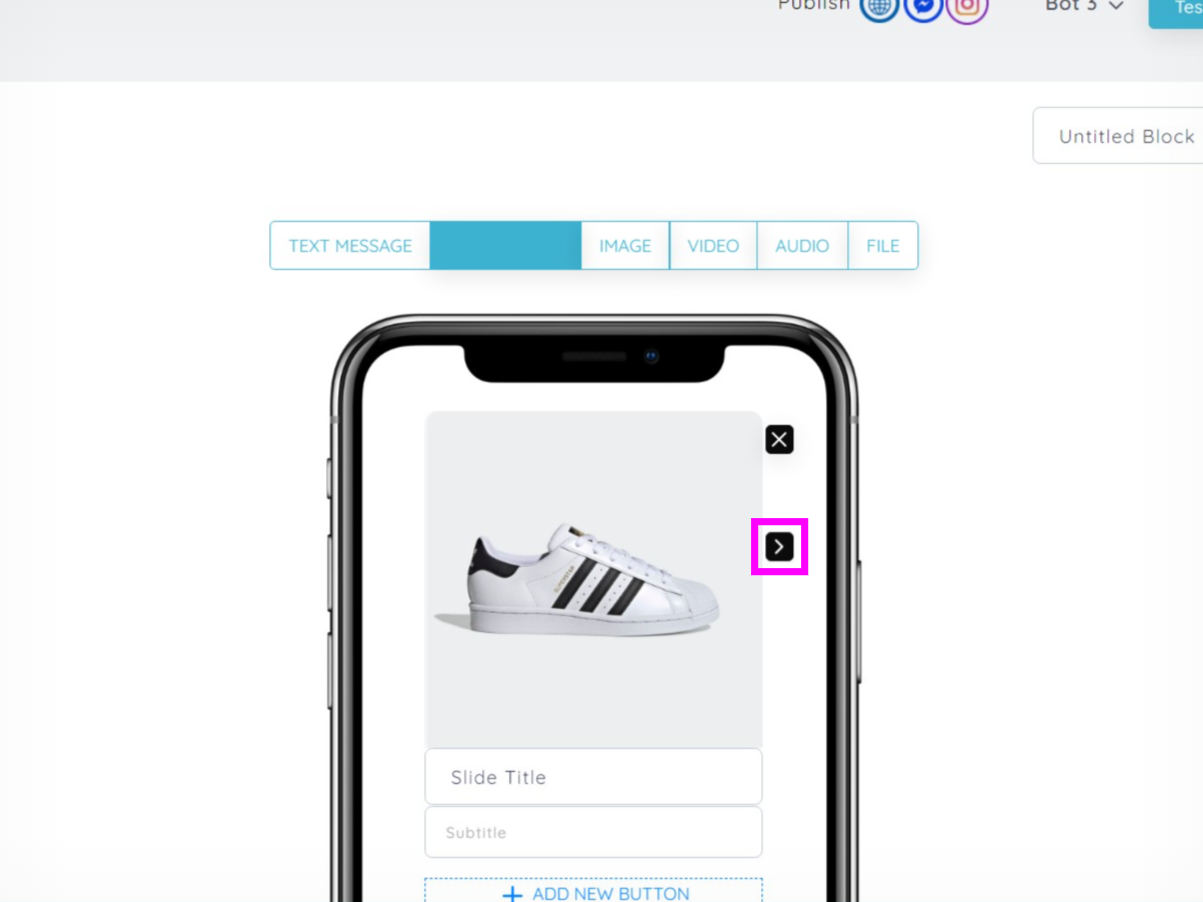
With the arrow, you can add more images and create an image slider.

Step 7

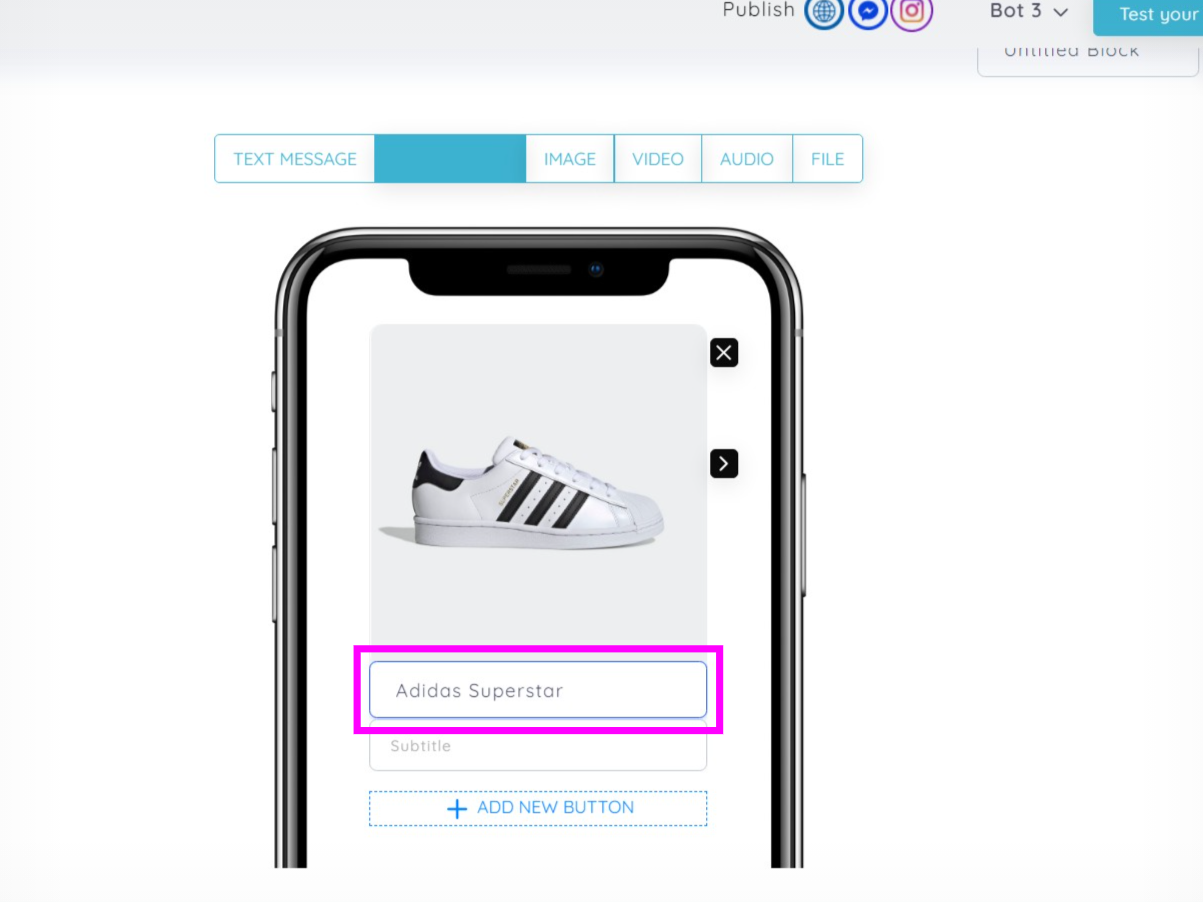
Add the title of the product, make sure it is clear to the audience, and defines the product accurately.

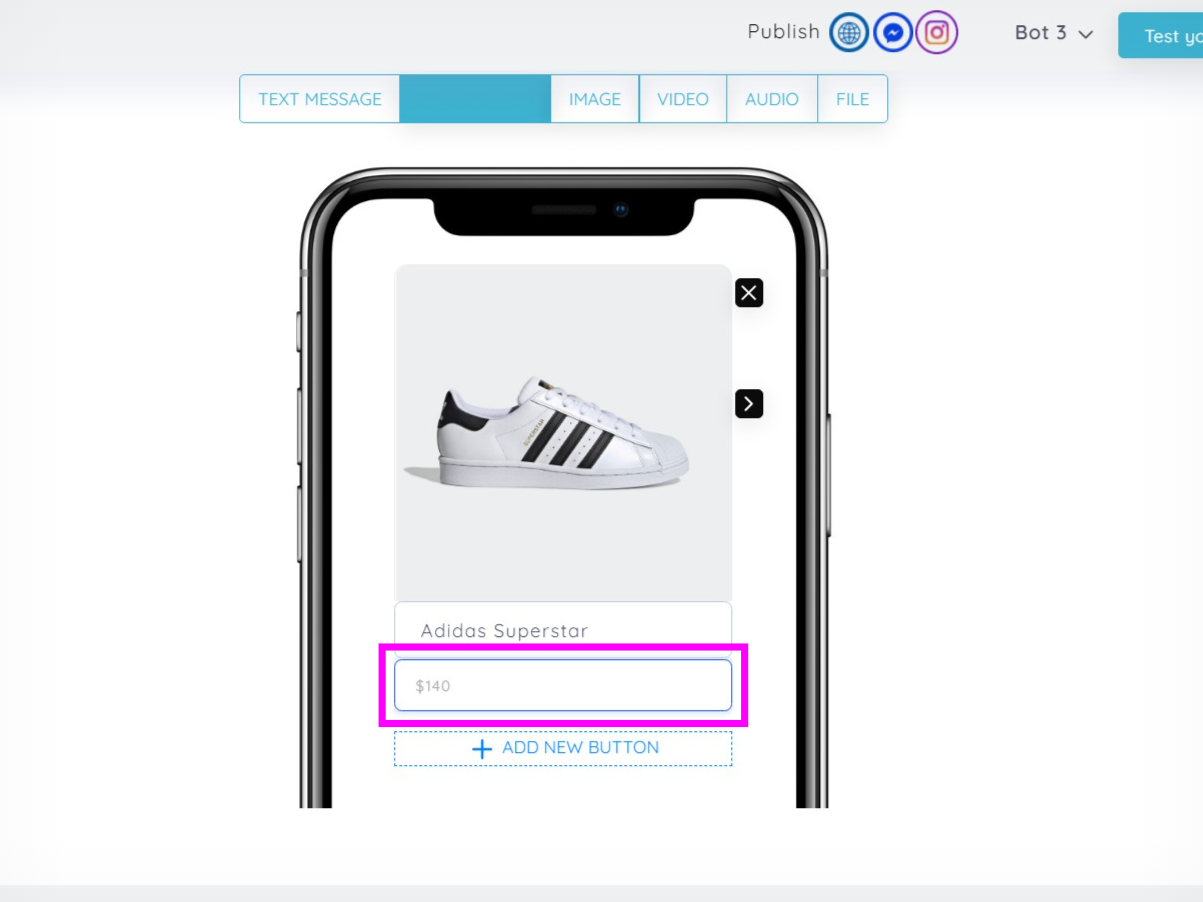
Also, add the subtitle that ideally includes the price of the product as shown above.

Step 8

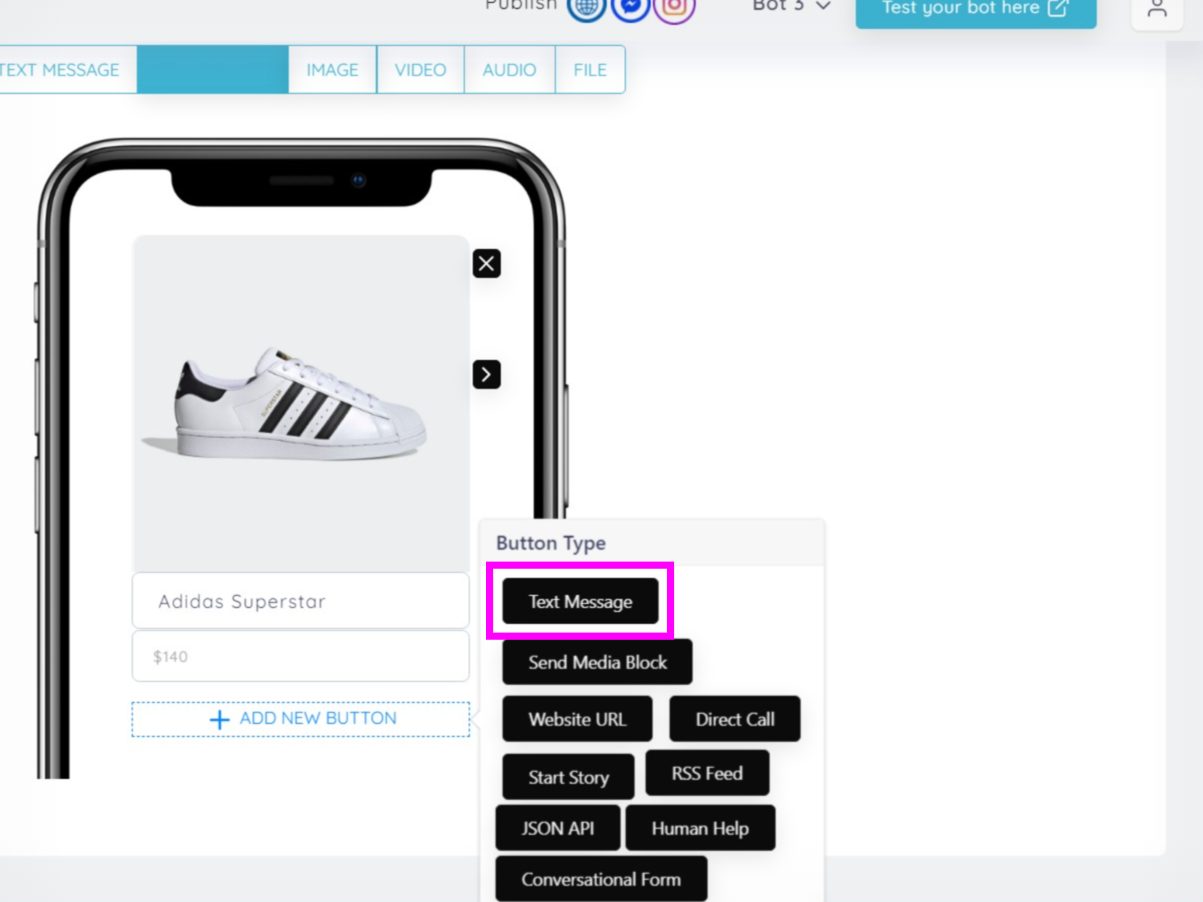
Furthermore, add new buttons such as; text messages, media blocks, and more as shown in the picture. Say you have chosen “text message”

Step 9

The next is to add the title of the button like here it is “buy now” showing the call-to-action for the user.

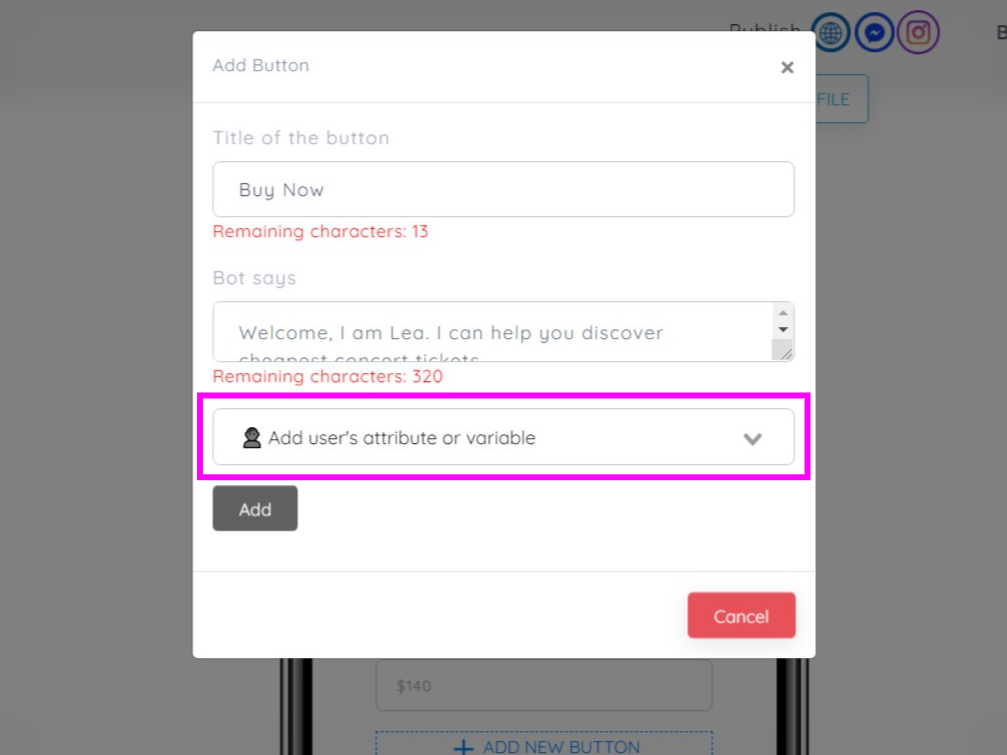
Also, add user attributes or variables for better assistance of the user.

Step 10

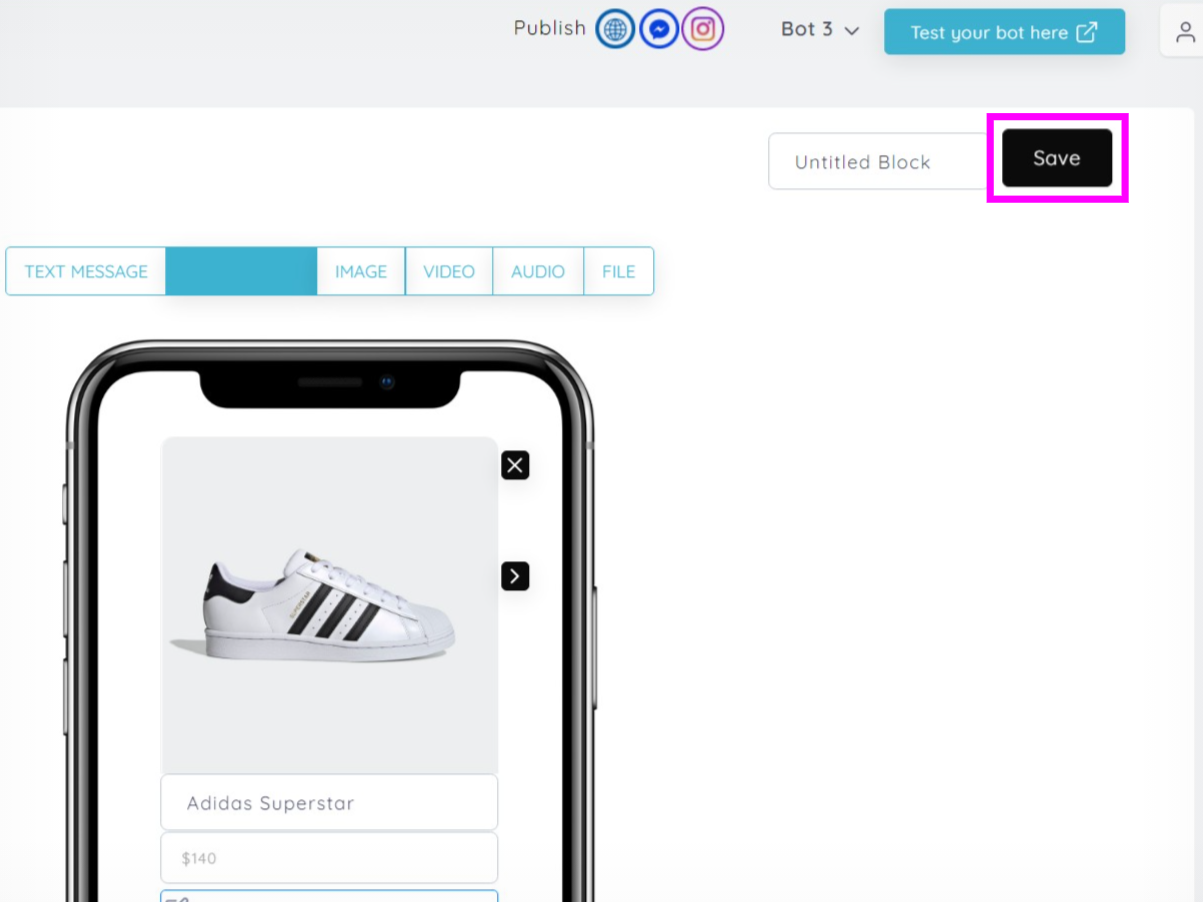
At last, save the media block by clicking on the “save” button, and so forth you can use the media block in the story.

NOTE: Likewise you can create the rest media blocks too.


How To Create A Conversational Form

How To Create A Conversational Form

This guide will help you understand the creation process of conversational form

Step 1

To create the very first conversational form, the first step is to hit “chatbot AI” from the left toolbar.

Step 2

A whole list of elements will show up then, click the “Conversational Forms” link to proceed.

Step 3

A window will appear showing to continue with the conversational form so, click the “Create Conversational Form” for the next step.

Step 4

A form will appear where you must enter the necessary details and then click the “Next” button.

Step 5

To receive the responses you get, hit the toggle on for immediate responses either via API or email

Click the “Email me responses Email” element and enter the email where you want the responses to be dropped

Step 6

Lastly, hit the save button to save the entire conversational form.


How To Create A Story?

Learn how to create a story from the scratch

Step 1

After signing in, the first step is to go to the “chatbot AI” from the extreme left toolbar.

Step 2

To begin with, story building, click the “Story” link from the chatbot AI section.

Step 3

A window like shown above will appear so click the “create a story” link to start creating the story.

Step 4

Enter the user message in the field pictured above.

Step 5

Enter the bot message in the field pictured above.

Step 6

After entering the details, do click the “Save” link and save your story.

Step 7

Once you have saved the story the next is to click the “Test your bot here” link and see if your bot is working accurately or not.


How To Create A Text Media Block

Learn how to create a text media block along with the use of buttons

Step 1

Go to the chatbot AI from the left toolbar

Step 2

Then click on the “Media Blocks”

Step 3

Next, a screen will appear showing your all media blocks. So click on “create media block” to start from scratch

Step 4

Click “Text Message” to start

Step 5

Enter the text you want to show up to the users.

Step 6

Then click “Add new button” to help users to get in touch with the bot easily

Step 7

By clicking the “add new button” a list of buttons will pop up. Choose the one you are looking for!

Step 8

Add the title of the button and its user attribute

Step 9

This is how all your buttons will look like

Step 10

Once you are done with the buttons, name the media block, and save it

Step 11

Lastly, test your bot to know if everything is working fine


How To Publish Chatbot On Website

A stepwise instructional guide to help you in understanding how you can publish a chatbot on the website

Step 1

For publishing the chatbot on the website the first step is to click the “settings”

Step 2

Furthermore, click to “Publish bot” to continue the process of publishing the chatbot on the website.

Step 3

Click the “Connect to Website” link to connect the chatbot with the website.

Step 4

Click the “Install Code Yourself” to view the script that will help you connect the chatbot with the website.

Step 5

At last, copy the script and paste where it is needed or you do want to embed it. Then close the window and you are done!


How To Publish Chatbot On Facebook

A stepwise instructional guide to help you in understanding how you can publish a chatbot on the Facebook

Step 1

For publishing the chatbot on Facebook the first step is to click the “settings”

Step 2

Furthermore, click to “Publish bot” to continue the process of publishing the chatbot on Facebook.

Step 3

Click the “Connect to Facebook” link to connect the chatbot with the Facebook.

Step 4

At last, Click the “Connect” link to finally connect your chatbot with Facebook.


How To Create A Datastore

Learn how to create a datastore and learn adding the attributes of your datastore

Step 1

To create a datastore the first step is to go to the Chatbot AI from the left toolbar

Step 2

Then click the “Datastore” button to proceed with the process.

Step 3

Once you have clicked the “Datastore” a new window will appear listing all of the datastores you have created. To start from scratch click the “Create a Datastore” button to proceed.

Step 4

Click the field pictured above and name the Datastore.

Just as above the datastore has been named as “furniture”

Likewise, enter the datastore values as mentioned below.

Step 5

After adding the “default attribute value” which is optional. The next step is to click the “Add Datastore” button to save the datastore.

Step 6

Once you have saved the datastore, you will be redirected to the page naming “manage datastore”. Search out your datastore as shown below.

Learn How To Add Greeting Messages


This is the instructional where you will learn how to add the greeting messages for your users!

Step 1

To add the “Greeting Message” for your users, the first step is to go to the settings.

Step 2

From the settings, go to the Greeting Message

Step 3

In the message section, add the message you want to show to the users.

Step 4

Choose the variable you want to address to your users such as; First name, Last name, or Full name

Step 5

At last, save the Greeting message by simply clicking on the save button

Step 6

Click the “Test your bot here” link.